Why Projector Installation Is the Step Most Buyers Get Wrong — And How to Fix It

Photo by Photo by PerOla Hammar on Unsplash on Unsplash
Purchasing a quality Sanyo LCD projector is the beginning of the process, not the conclusion. The decision that follows — how the unit is physically installed, positioned, and calibrated — will determine whether that investment delivers the image quality it was engineered to produce. Across both commercial and residential settings, installation errors are among the most common and most correctable sources of degraded projection performance.
This article addresses those errors directly. It draws on patterns observed in business conference rooms, university lecture halls, and home media spaces throughout the United States. The goal is not to discourage independent installation — many users handle it capably — but to ensure that the decisions made during setup are informed ones.
The Throw Distance Problem
Throw distance — the measured gap between the projector's lens and the projection surface — is the most mathematically consequential installation variable, and it is the one most frequently approximated rather than calculated.
Consider a scenario that recurs with notable regularity: a corporate training facility in the Dallas area installs a Sanyo projector on a ceiling mount, estimating throw distance by eye. The resulting image fills the screen but appears consistently soft at the edges and slightly oversized, requiring the zoom ring to be pushed to its optical limit. What the installer did not account for was that operating a lens at the extreme end of its zoom range degrades corner sharpness. The projector was capable of a sharper image — the installation position prevented it from delivering one.
Every Sanyo projector model has a published throw ratio: the relationship between throw distance and image width. Before mounting any unit, calculate the required distance using the manufacturer's throw ratio and your intended screen dimensions. Do not estimate. A tape measure and fifteen minutes of arithmetic will protect thousands of dollars of equipment from underperforming indefinitely.
Keystone Correction: A Feature, Not a Solution
Digital keystone correction is one of the most misunderstood features in consumer and commercial projectors. It exists to accommodate minor angular misalignment — a few degrees of vertical or horizontal tilt — not to compensate for fundamental positioning errors.
A home theater owner in the Pacific Northwest documented a situation that illustrates this clearly. His projector was ceiling-mounted at an angle that required 25 degrees of vertical keystone correction to produce a rectangular image. The result was technically rectangular but visibly soft, with reduced effective resolution and uneven brightness distribution across the panel. Keystone correction works by discarding pixel data and interpolating a corrected image. The more correction applied, the more information is sacrificed.
The correct approach is to position the projector so that its lens axis aligns as closely as possible with the center of the screen. Lens shift — an optical adjustment available on many Sanyo models — should be used in preference to keystone correction whenever both are available. Optical adjustments preserve full resolution; digital corrections do not. Reserve keystone correction for fine-tuning, not structural alignment.
Screen Surface and Ambient Light Interaction
The projection surface is part of the optical system, not merely a passive backdrop. Installers who select screen material without considering the room's lighting conditions — and the projector's gain requirements — frequently produce results that disappoint despite using capable equipment.
A gain-1.0 matte white screen performs admirably in a fully darkened room but reflects ambient light indiscriminately in a space with windows or overhead fluorescents. A gray screen with higher ambient light rejection may produce superior contrast in a typical American living room or conference space where complete light control is impractical. Conversely, a high-gain screen paired with a bright projector in a controlled environment can introduce hot-spotting — a bright central region that fades toward the edges.
Match screen characteristics to the room, not merely to the projector's specification sheet. When in doubt, consult the screen manufacturer's gain recommendations relative to your projector's lumen output and your room's dimensions.
Ventilation and Thermal Management
Projectors generate substantial heat. The lamp or light engine, optical components, and processing electronics all require consistent airflow to operate within design tolerances. Ignoring ventilation during installation shortens lamp life, accelerates component wear, and — in enclosed cabinet installations — can trigger thermal shutdowns mid-presentation.
A law firm in Atlanta learned this lesson after installing a Sanyo projector inside a custom AV cabinet with insufficient rear clearance. Lamp life fell to roughly sixty percent of the rated hours, and the unit began shutting down during extended client presentations. The resolution required relocating the projector to a ceiling mount with unobstructed airflow — a straightforward fix that should have been part of the original installation plan.
As a practical standard: maintain at least twelve inches of clearance around all intake and exhaust vents. Never install a projector in an enclosed space without verifying that the enclosure includes active ventilation capable of maintaining ambient temperature within the projector's operating range.
Calibration: The Step That Completes the Installation
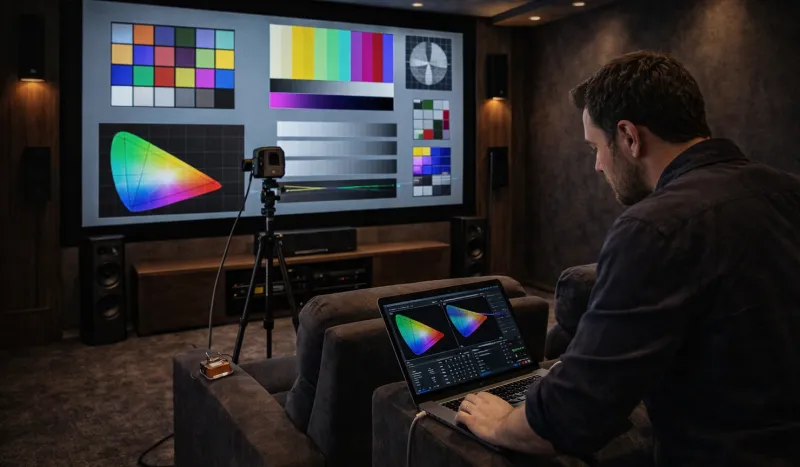
Physical installation and image calibration are two distinct phases, and treating them as a single step is a common shortcut with measurable consequences. A projector that is correctly positioned and mounted but never calibrated will still produce inaccurate color, improper gamma, and misaligned white balance.
For home theater applications, a calibration disc — or, ideally, professional calibration using a colorimeter — will align the projector's output to established standards such as Rec. 709 for HD content. For business environments where accurate document and presentation rendering matters, at minimum adjust brightness, contrast, and color temperature using a test pattern rather than relying on factory presets.
Installation Checklist
The following steps apply to both residential and commercial Sanyo projector installations:
- Calculate throw distance using the model's published throw ratio before selecting a mount position.
- Align the lens axis with the horizontal and vertical center of the screen as closely as room geometry allows.
- Use lens shift before keystone correction. Apply digital keystone adjustment only for minor fine-tuning.
- Select screen material based on room lighting conditions and projector output, not aesthetics alone.
- Verify ventilation clearances of at least twelve inches around all vents before finalizing the mount position.
- Calibrate after installation using test patterns, a calibration disc, or professional measurement tools.
- Document the installation settings — mount position, zoom, focus, lens shift values, and calibration parameters — so that any future adjustments can be made from a known baseline.
The Long-Term Case for Getting It Right
A properly installed and calibrated Sanyo projector will outperform a carelessly installed unit of nominally superior specifications. The hidden cost of poor installation is not merely a suboptimal image on day one — it is accumulated lamp wear, shortened component life, and the recurring frustration of equipment that never quite delivers what its specification sheet promised.
Installation is not an afterthought. It is the process by which a quality projector becomes a quality projection system. Approach it with the same deliberateness you applied to the purchase decision, and the investment will reward you with consistent, reliable performance for years.