Why Your Sanyo Projector's Colors Look Wrong — And Six Steps to Restore Them
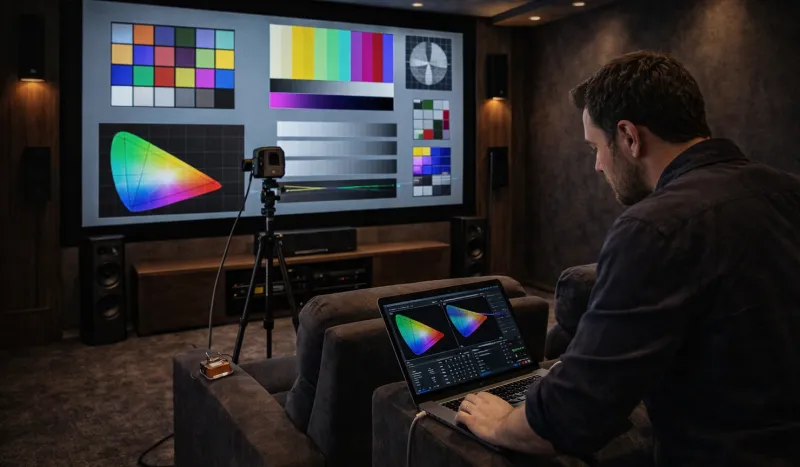
Photo: projector color calibration setup home theater business presentation, via www.palmbeachcustomav.com
A Sanyo LCD projector represents a meaningful investment in presentation quality, whether it anchors a corporate conference room in Chicago or serves as the centerpiece of a dedicated home theater in suburban Dallas. When the image that reaches your screen looks washed out, shifted toward an unnatural tint, or simply lacks the depth you expected, the instinct is often to assume a hardware fault. In most cases, however, the culprit is one of a handful of preventable setup and calibration errors — problems that respond well to methodical correction.
The following guide walks through the five most common mistakes that compromise color accuracy in Sanyo LCD projectors, paired with clear remediation steps that restore the visual fidelity the platform is designed to deliver.
Mistake 1: Ignoring the Color Temperature Preset
Sanyo LCD projectors ship with multiple color temperature presets — typically labeled Warm, Normal, and Cool (or equivalent numerical values such as 5500K, 6500K, and 9300K). Many users leave the factory default untouched, assuming it represents an optimized baseline. It rarely does.
A Cool or high-color-temperature setting pushes the image toward blue-white, which can appear vivid under fluorescent office lighting but crushes shadow detail and shifts skin tones toward an unnatural pallor. Conversely, an overly warm setting muddies whites and makes data-heavy slides harder to read.
The Fix: Navigate to your projector's Picture or Color menu and select a color temperature of 6500K (often labeled "Warm" or "Cinema") for home theater use, or 6500K–7500K for business presentations in moderately lit rooms. If your model supports manual RGB gain and bias adjustments, use a free calibration tool such as the Spyder X or a test pattern disc to fine-tune white balance. Even a rough manual adjustment will yield a measurable improvement over a mismatched preset.
Mistake 2: Operating Under Uncontrolled Ambient Light
LCD projectors — including Sanyo's high-brightness business models — are fundamentally different from emissive displays. They project light onto a surface, meaning any competing light source in the room directly dilutes contrast and color saturation. Ambient light is the single most destructive environmental factor for perceived image quality.
Common offenders in US office environments include south-facing windows without adequate blinds, overhead fluorescent banks that cannot be independently switched, and desk lamps positioned behind the audience and aimed toward the screen.
The Fix: Whenever possible, pair your Sanyo projector with a gray or ambient-light-rejecting (ALR) screen rather than a standard white surface. ALR screens are engineered to reflect the projector's on-axis light while absorbing off-axis room light, preserving contrast even in partially lit spaces. For rooms where full blackout is impractical, reduce overhead lighting to roughly 50% and position any remaining fixtures to illuminate the audience rather than the screen. Even modest light management can recover one to two stops of effective contrast.
Mistake 3: Skipping Lens Alignment and Focus Verification
A projector that is physically misaligned — tilted, rotated, or set at an angle that requires aggressive keystone correction — will never deliver optimal sharpness or color uniformity across the full image. Digital keystone correction distorts the pixel grid, reducing effective resolution and introducing subtle color fringing at high-contrast edges.
This is a particularly common issue in boardrooms and classrooms where the projector is ceiling-mounted but never professionally aligned after installation.
The Fix: Wherever possible, use physical lens shift (available on most Sanyo LCD business projectors) to center the image on the screen without relying on digital keystone. If some keystone correction is unavoidable, limit it to the minimum value necessary — ideally no more than ±15 degrees. Additionally, verify focus at the four corners of the image, not just the center. If corner focus is significantly softer than center focus, the projector may need its lens seating inspected or the throw distance adjusted to fall within the lens's optimal range.
Mistake 4: Neglecting the Air Filter
This is perhaps the most overlooked maintenance issue in LCD projector ownership. Sanyo LCD projectors use a lamp-based illumination system that generates substantial heat. The air filter prevents dust from accumulating on the optical path — specifically on the LCD panels and color filters — but it must be cleaned regularly to do its job.
A clogged filter restricts airflow, raises internal temperatures, and accelerates color degradation in the LCD panels themselves. Over time, a thermally stressed LCD panel develops uneven color uniformity, often manifesting as a yellowish or greenish cast in one corner of the image.
The Fix: Consult your model's documentation for the recommended filter cleaning interval — typically every 100 to 300 hours of use. Remove the filter according to the instructions in your Sanyo owner's manual, clean it with compressed air or a soft brush, and reinstall it firmly. If the filter is visibly damaged or heavily soiled beyond cleaning, replace it with a genuine Sanyo OEM filter. This single maintenance step can meaningfully extend both lamp life and panel color consistency.
Mistake 5: Using the Wrong Color Mode for the Source Material
Sanyo LCD projectors offer multiple picture mode presets — commonly including Presentation, Cinema, sRGB, Dynamic, and Blackboard. Each mode applies a distinct gamma curve, color gamut mapping, and brightness profile. Using Dynamic mode for a film screening, or Cinema mode for a spreadsheet presentation, introduces a category mismatch that no amount of manual adjustment will fully resolve.
The Fix: Match the picture mode to the primary use case. For business presentations involving slides, documents, and data visualization, Presentation or sRGB mode provides accurate color rendering against a white or light-gray background. For video content, film, or home theater applications, Cinema mode applies a gamma curve optimized for a darkened room. If your projector supports a Custom or User mode, save your calibrated settings there to avoid accidentally overwriting them when switching between modes.
A Final Note: Recalibrate After Every Lamp Replacement
One step that many users overlook is recalibrating the projector after installing a new lamp. Replacement lamps — even genuine Sanyo lamps — have a different initial brightness and color temperature than an aged lamp. An image that looked correctly calibrated at 1,000 lamp hours may appear noticeably blue or overly bright after a lamp swap. Treat every lamp replacement as an opportunity to run through the calibration steps outlined above, and your Sanyo projector will continue to deliver consistent, accurate images throughout its operational lifespan.
With the right setup practices in place, there is no reason a properly maintained Sanyo LCD projector cannot produce reference-quality images for years of business and home theater use. Clarity in every pixel begins with the choices made before the first presentation ever starts.