Mounting Height Myths: What Your Installer Never Told You About Projector Position and Picture Performance
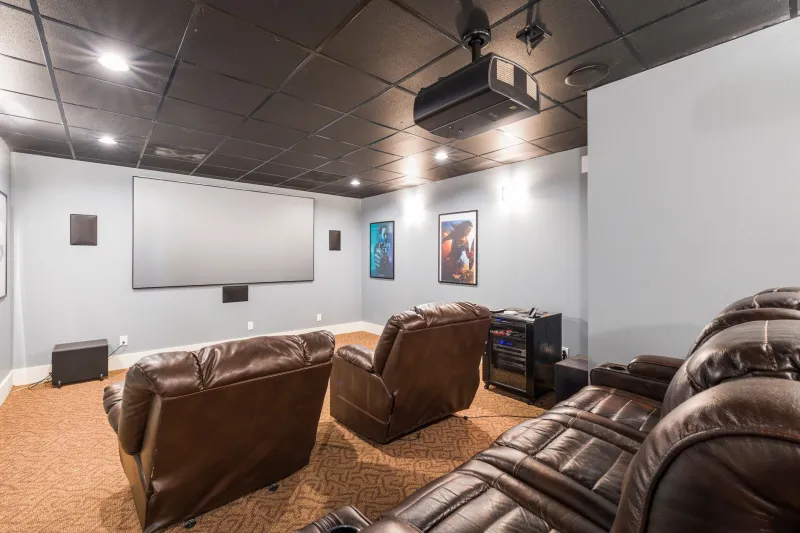
When most homeowners and AV integrators plan a projector installation, mounting height is treated almost exclusively as a geometry problem. How high does the lens need to sit to fill the screen without excessive keystone correction? Where does the unit clear the heads of seated viewers? These are reasonable questions, but they represent only a fraction of what mounting height actually determines. The physical elevation of your projector influences thermal behavior, color rendering consistency, and the long-term mechanical stability of your optical assembly in ways that rarely appear in installation guides — and almost never appear in manufacturer spec sheets.
For Sanyo LCD projector owners in particular, understanding this relationship is not a matter of fine-tuning. It is a matter of protecting a precision optical system from conditions that gradual, preventable degradation.
Why Elevation Is a Thermal Variable, Not Just a Geometry One
LCD projectors generate significant heat during operation, and their cooling systems are engineered with specific airflow assumptions baked into the design. Most Sanyo LCD units draw cooler air through intake vents positioned along the lower or side surfaces of the chassis and exhaust warm air through outlets near the rear or top. This airflow path is calibrated for a unit operating in open, relatively unobstructed space.
When a projector is ceiling-mounted at an unusually low height — close to a drop ceiling, inside a recessed housing, or within a few inches of a structural soffit — the exhaust air has nowhere to dissipate efficiently. It accumulates in the confined space above the unit, raising the ambient temperature immediately surrounding the chassis. The projector's intake then draws in pre-warmed air rather than room-temperature air, which reduces the cooling system's effective capacity. Over time, this forces internal components to operate at elevated temperatures that accelerate lamp degradation, stress the LCD panels, and can trigger the unit's thermal protection circuitry — causing mid-session dimming or unexpected shutdowns.
Conversely, mounting a unit at an excessively high elevation near the ceiling of a tall room can expose it to thermal stratification. Hot air naturally rises and collects near the ceiling in any enclosed space, meaning the projector may be operating in air that is several degrees warmer than the room temperature measured at seated height. The result is functionally similar: reduced cooling efficiency with no visible cause.
The practical implication is that your mounting height should be evaluated not just in terms of throw angle, but in terms of the thermal microenvironment your projector will inhabit for thousands of operational hours.
Color Uniformity Across the Image Plane
LCD projectors produce images by passing light through three separate liquid crystal panels — one each for red, green, and blue. These panels are sensitive to temperature gradients. When one region of the panel runs warmer than another due to uneven airflow or proximity to a heat source, subtle shifts in how that region responds to the light signal can emerge over time. The result is color non-uniformity: a condition where the white balance, saturation, or luminance at one corner or edge of the projected image diverges from the rest of the frame.
Mounting height contributes to this problem in a specific way. Units positioned very close to a ceiling or enclosed surface on one side create asymmetric airflow across the chassis. The side of the unit facing the obstruction receives less ventilation than the side facing open room air. Internal temperature gradients follow, and those gradients can affect the LCD panels unevenly. This type of color drift tends to be slow and subtle — the kind of change that accumulates over months rather than appearing overnight — which makes it easy to attribute to lamp aging or panel wear rather than installation conditions.
Properly planned mounting height, with adequate clearance on all sides of the chassis, allows the cooling system to function symmetrically. This maintains more consistent thermal conditions across the optical assembly and reduces the likelihood of panel-level color non-uniformity developing prematurely.
Convergence Stability and the Role of Physical Stress
Optical convergence — the precise alignment of the red, green, and blue image planes produced by the three LCD panels — is one of the most delicate performance characteristics of any LCD projector. Manufacturers calibrate convergence at the factory under controlled conditions, and modern Sanyo LCD units maintain this calibration well under normal operating circumstances. However, physical stress on the optical assembly can cause convergence to drift over time.
Mounting height introduces a mechanical variable that is easy to overlook: the angle of tilt required to align the projector with the screen. When a unit is mounted significantly higher than the center of the screen, a downward tilt is applied to the mount. When mounted lower than ideal, an upward tilt compensates. Both configurations place the internal optical components under a sustained gravitational load that differs from the flat, level position assumed during factory calibration.
This is not an immediate problem. Sanyo LCD projectors are built with mechanical tolerances that accommodate modest tilt angles without issue. But over years of continuous use, a sustained off-axis tilt can contribute to micro-level shifts in the prism assembly and panel alignment. The outcome is slow convergence drift — the gradual appearance of color fringing along high-contrast edges — that is difficult to reverse without professional recalibration.
The most convergence-stable installation is one where the projector can sit as close to level as possible, with lens shift handling the vertical offset rather than physical tilt. This is only achievable when the mounting height is selected with the projector's lens shift range in mind from the beginning of the planning process.
Practical Guidelines for Height Selection
Several principles should inform your mounting height decision beyond the basic throw distance calculation.
Prioritize vertical lens shift over physical tilt. Sanyo LCD projectors offer meaningful vertical lens shift ranges that allow the projected image to be positioned above or below the optical center without tilting the unit. Using this adjustment rather than angling the mount keeps the chassis level and reduces mechanical stress on the optical assembly.
Confirm clearance above and around the chassis. Before finalizing a ceiling mount position, verify that there is at least eight to twelve inches of unobstructed space above the projector's exhaust vents, and that no adjacent structural elements restrict airflow on the intake side. This is especially important in finished basements, media rooms with drop ceilings, or custom millwork installations.
Account for the room's thermal stratification. In rooms with high ceilings, measure the ambient temperature at the intended mounting elevation, not just at floor level. If the upper zone of the room runs notably warmer — common in rooms without ceiling fans or zoned HVAC — consider whether the mounting height can be lowered to a cooler zone without sacrificing image geometry.
Revisit height assumptions after layout changes. If you rearrange seating, replace the screen, or modify the room's HVAC configuration, reassess whether the original mounting height still represents the best balance of thermal, optical, and geometric factors. Conditions change, and an installation that was well-considered initially may become suboptimal after a room renovation.
The Overlooked Dimension of a Complete Installation
Projector installation guides focus heavily on throw ratios, screen sizing, and cable management. These are legitimate priorities. But mounting height is a variable that touches thermal performance, color consistency, and long-term optical stability simultaneously — and it is a decision made once, at the beginning of a system's life, with consequences that compound over years of use.
For owners investing in Sanyo LCD projection technology, the goal is not simply to get the image on the screen. It is to preserve the clarity and accuracy of that image across every hour of operation. Mounting height, approached with the same rigor applied to screen selection or signal infrastructure, is one of the most cost-effective ways to protect that investment before the first lamp hour is ever logged.